How to create a Product Add-ons offer (updated)
Overview
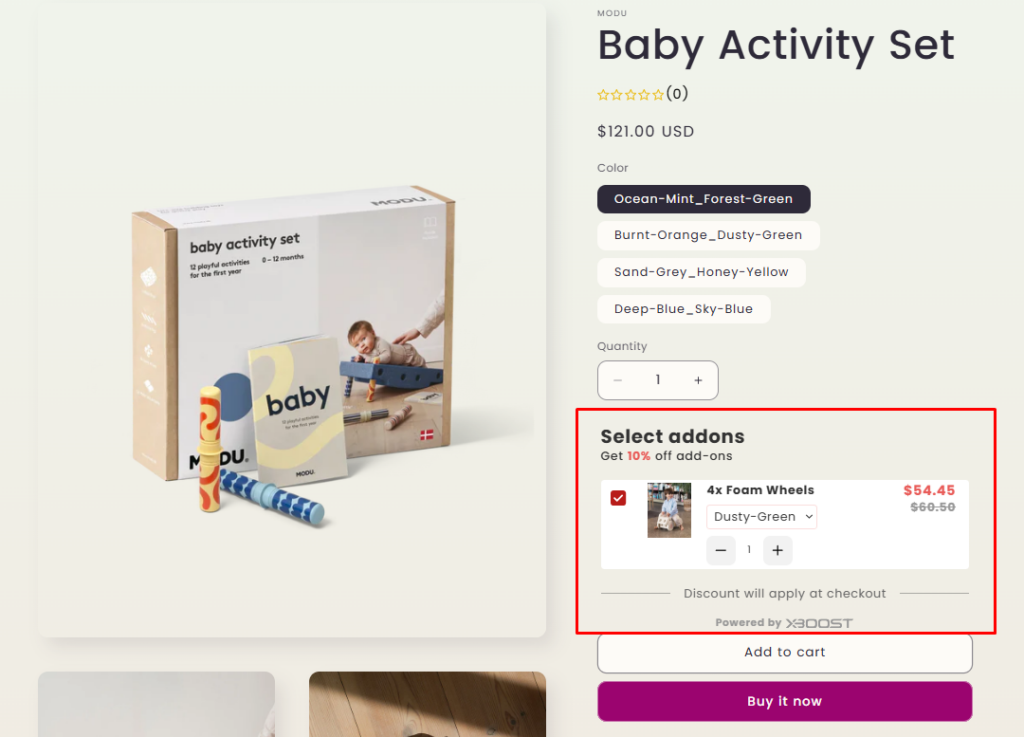
Creating a checkbox upsell offer is a great way to increase your average order value by encouraging customers to buy related products together at a discounted rate.
Example of a checkbox upsell offer:- Product X, Add product Y for only $10 more by selecting the checkbox.
This encourages customers to consider Y as a low-cost add-on, increasing the overall sale value.
User Guide
Here’s a detailed guide on how to create a checkbox upsell offer using Xboost: AI Upsell & Bundles in Shopify:
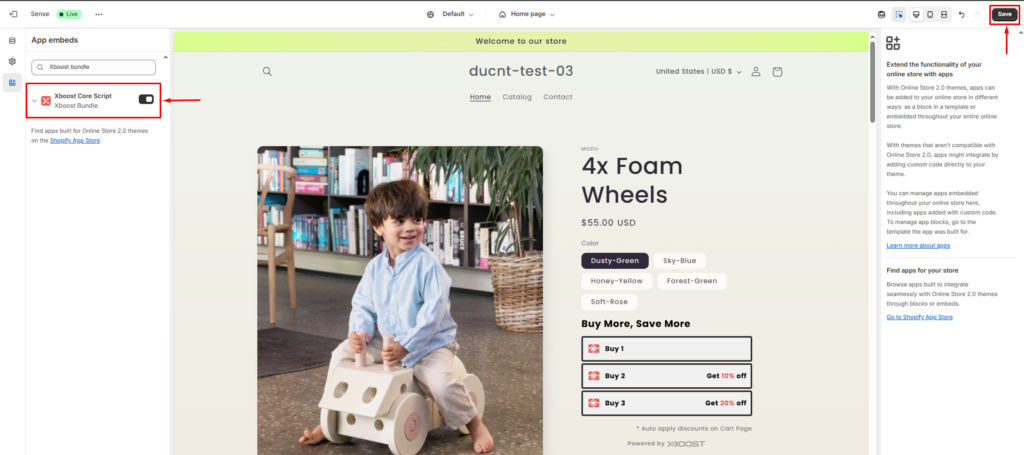
First of all, please activate the core script of Xboost: AI Upsell & Bundles to use the app.
- Click on App Embeds, toggle on the app, and click Save.
- Go to Online Store>Themes, then click Customize.
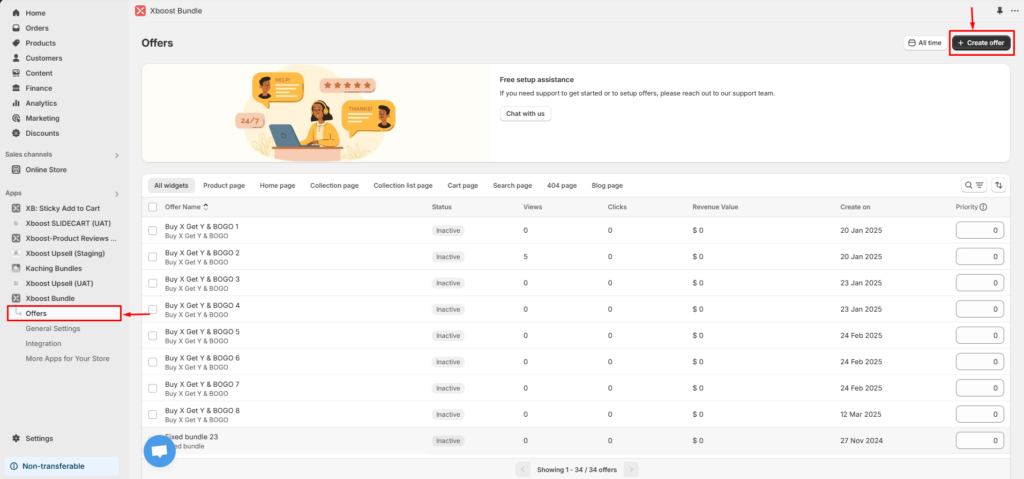
1. Start creating the offer
- Click Create offer from the Xboost: AI Upsell & Bundles app's offers page.
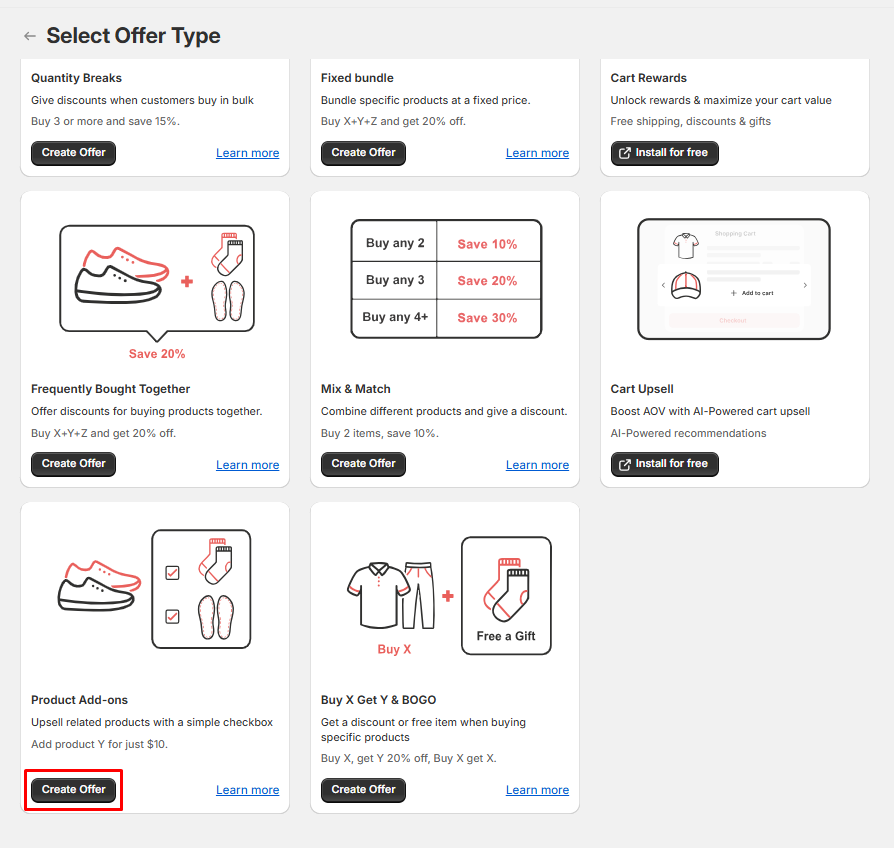
2. Select offer type
- Click Create Offer in Product Add-ons option.
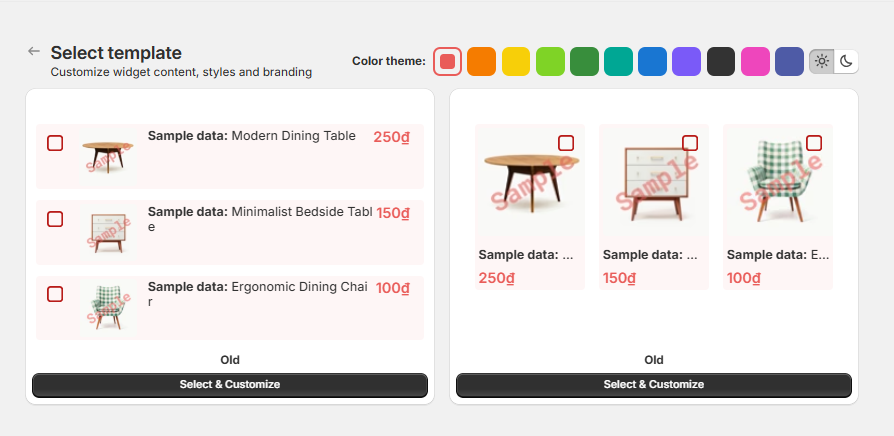
3. Select template
- Select the template and color as you want.
4. Name the offer (optional)
- Click button Edit title to change title.
5. Setting Trigger Products
The Checkbox Upsell offer allows you to choose ‘Trigger’ products and ‘Offer’ products.
- The trigger product is the primary product that the customer intends to buy.
- Offer products are the upsells you wish to promote along with the trigger product.We have 3 options for trigger product:
- Specific product: You can view and select products. The offer will be displayed and triggered only for the specific products you selected.
- Automated: You can view and select collections. The offer will be displayed and triggered only for the products in collections you selected.
- All products: All products are selected. The offer will be displayed and triggered only for the products in your store. Scheduled timeallows you to configure the time to activate offers for products.If you don't select Scheduled time, the offer will be applied immediately when the offer is added successfully and will remain until it is removed.If you select Scheduled time, you can config start and end time to the offer. Note: The start time must be before the end time.Let's select products type and active date to create the offer.
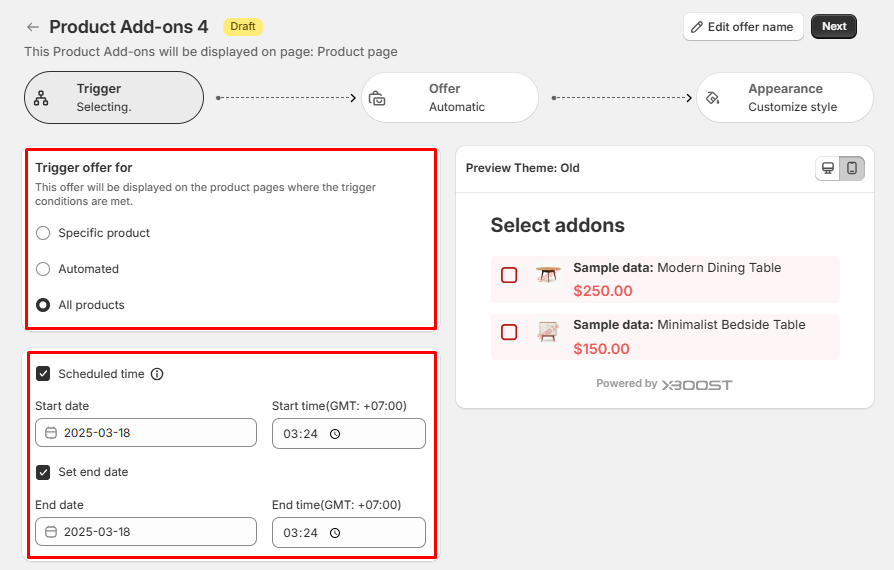
- Click Next to proceed.
6. Setting the offer
-
Select offer products.Offer products have 2 options:-Manual: You can view and select product manually.-Automatic: The offered products will be displayed automatically by the recommendation source you selected. You can also select the number of products shown in the offer.
-
Tick on Enable discount to enable the discount.
-
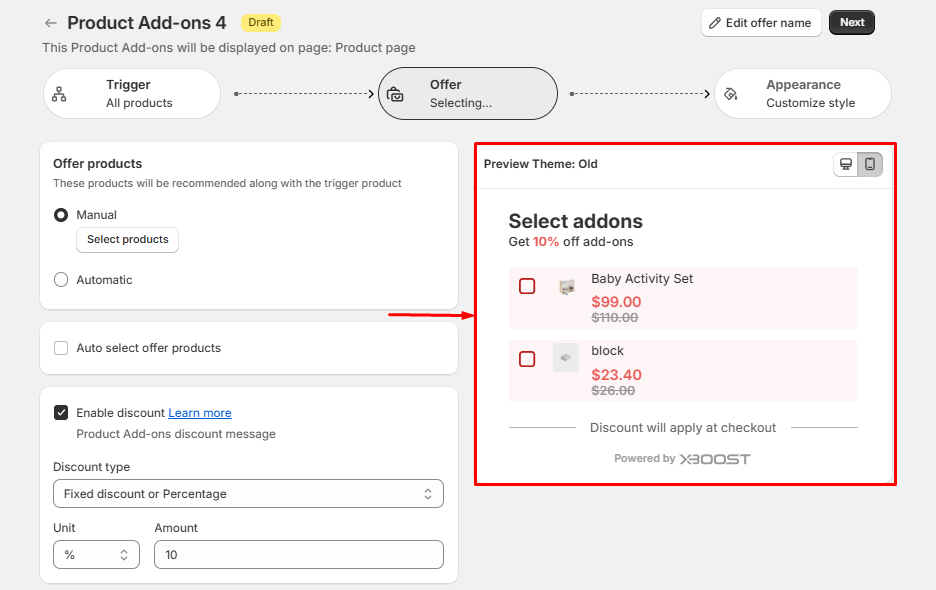
Configure the discount.-Default price: The price of products will be original price.-Fixed discount or percentage: The discount will be applied to Y products if the customer purchases the required X products, based on configuration before. Example: Buy X get Y 20%.-Free gift: The customer will receive Yas a free gift if they purchase Xproducts.
-
Auto select offer products allows you configuring auto select offer products on the widget or not.
-
Customization allows you can customize offer title, subtitle and discount message.
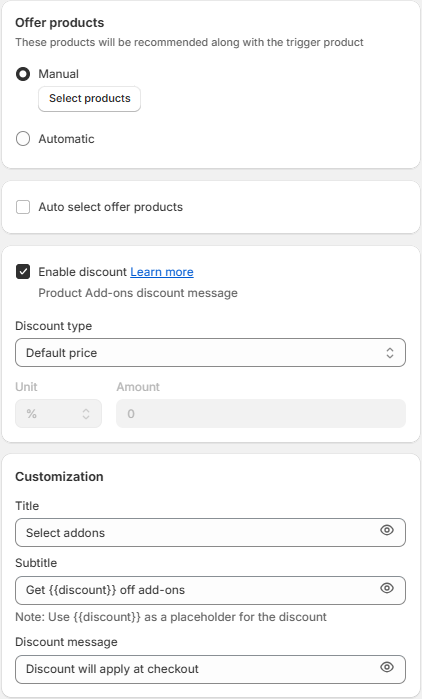
- Click Hide icon to visible/invisible text.
- Click Next to proceed.
After configuring the offer, you can preview it on the Preview site.
7. Appearance setting (optional)
Please refer How to customize a Product Add-ons widget to customize a widget.
8. Finish creating the offer
Click Publish to complete creating a checkbox upsell offer.

9. Test on storefront
You can preview how your offers, products, or promotions will appear to customers in your online store by using Test on storefront feature. Please refer How to use Test on storefront function to more information about the feature.