
How to set the delivery steps and dates
Overview
The Content step sets the message and the delivery timeline. Each step after Purchased has a minimum and maximum number of days. The app adds them up from the day the shopper views the page, skips your non-working days and blocked dates, and shows a date range for each step.
Steps
1. Open the Content step
Open Estimated Delivery, click the estimate name, then click Content at the top of the editor.
2. Write the message
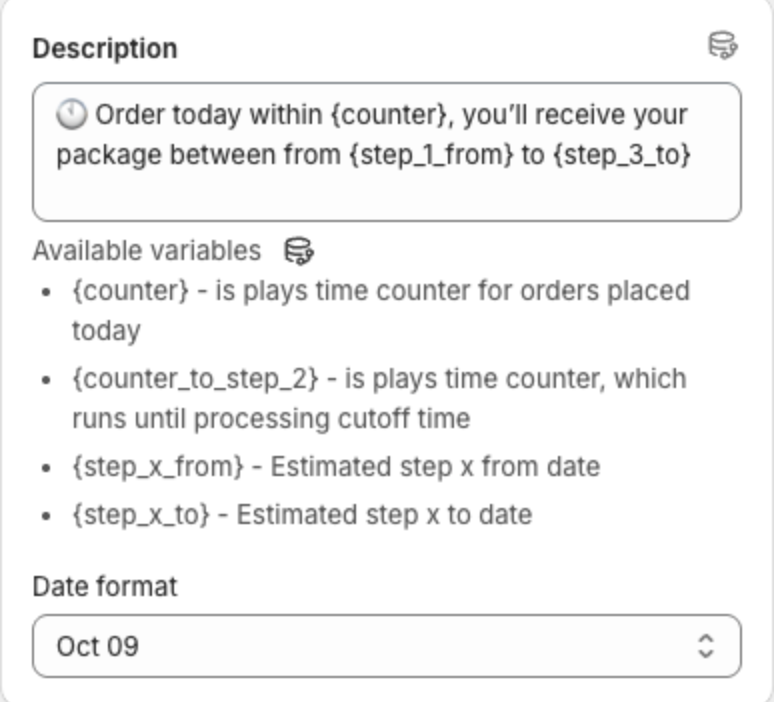
Under Description, write the message shoppers see above the timeline. Click the variable icon to insert a value:
| Variable | Shows |
|---|---|
{counter} | A countdown for orders placed today: the time left until the processing cutoff, or until midnight once the cutoff has passed. |
{counter_to_step_2} | A countdown to the next processing cutoff time. |
{step_x_from} | The earliest date of step x, for example {step_3_from} for the third step. |
{step_x_to} | The latest date of step x, for example {step_3_to}. |
Pick how dates look in Date format, for example Oct 09 or Friday, 09 Oct.
3. Set each step
Under Estimated Delivery Step, click a step to open it:
- Purchased — the first step is always the day the shopper views the page. Set its Icon, Title and Date format.
- Processing — the time you need to prepare the order:
- Min waiting time and Max waiting time in days.
- Cutoff time — orders placed after this time start processing on the following day.
- Ignore customer timezone — by default, the cutoff is the same moment for everyone (16:00 in your time zone may be 10:00 for a shopper in Europe). Select this to use the same clock time in every shopper's time zone instead.
- Working days — the days you process orders. Click a day to turn it on or off.
- Blocked dates — click Add Blocked Dates to skip holidays or closed days.
- Date format and Date range separator (for example "-" in "Oct 10 - 11").
- Delivered — the shipping time: Min waiting time, Max waiting time, Working days, Blocked dates, Date format and Date range separator.
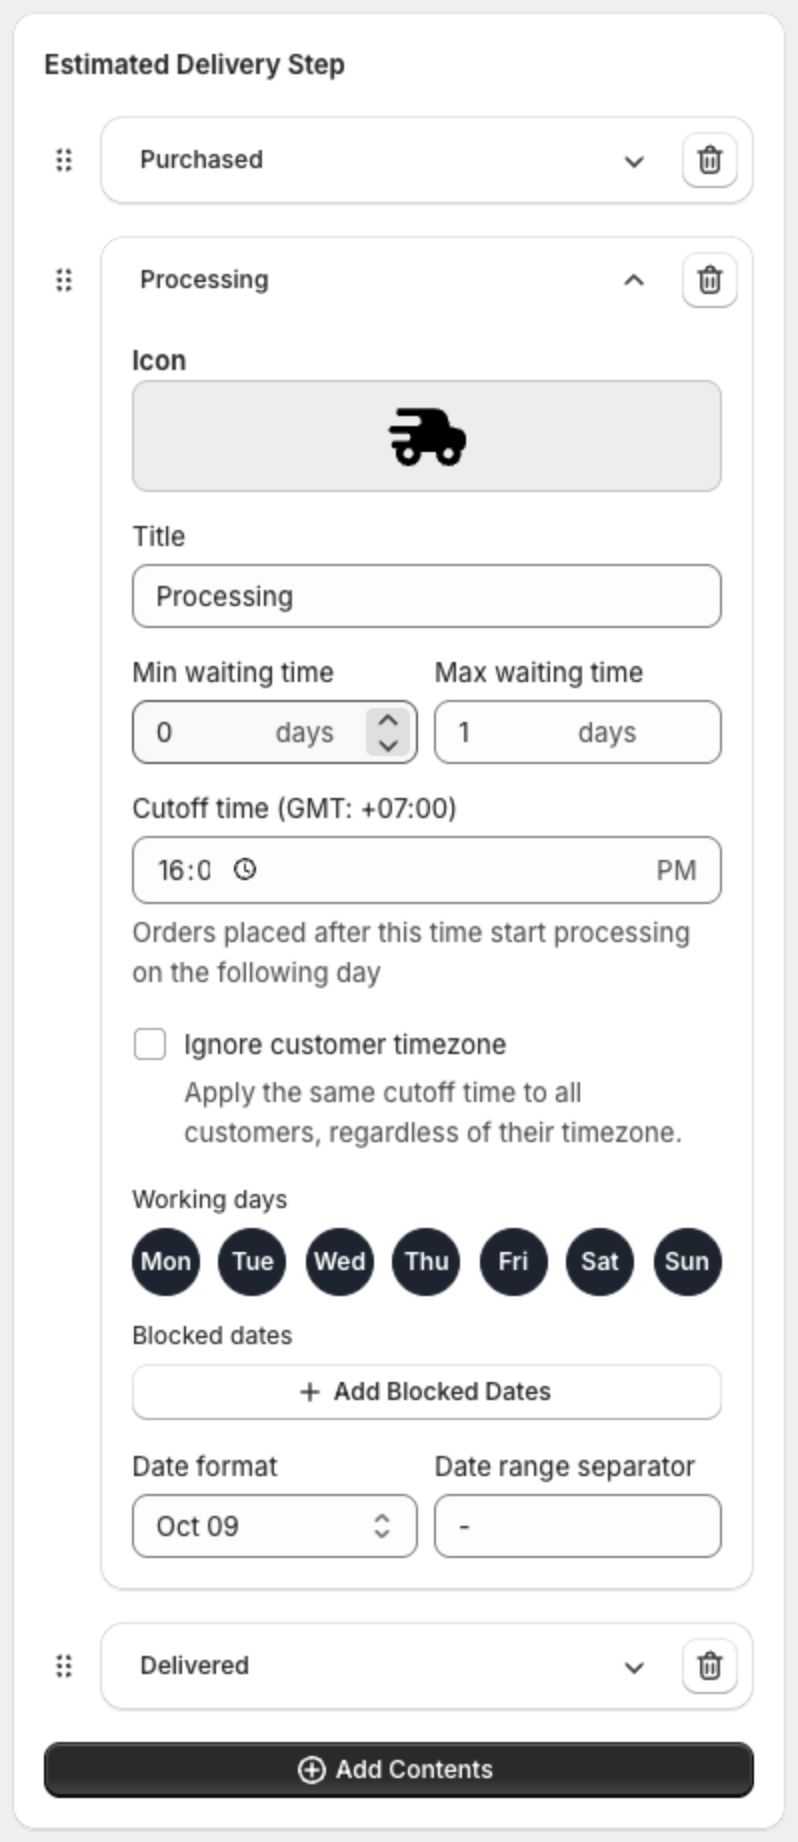
To add another step, click Add Contents. Drag steps by the handle to reorder them, or delete a step with the trash icon.
4. Choose the estimate mode
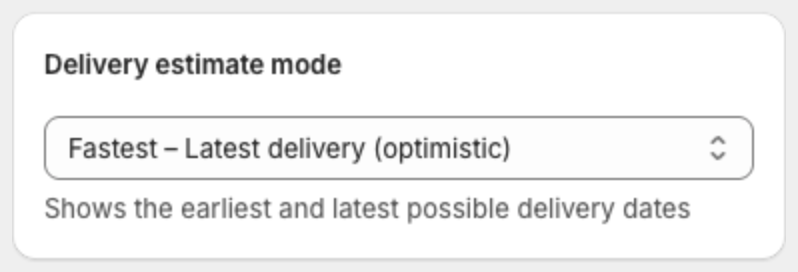
Under Delivery estimate mode:
- Fastest – Latest delivery (optimistic) — each step starts from the earliest date of the step before. "Shows the earliest and latest possible delivery dates."
- Safe delivery window (conservative) — each step starts from the latest date of the step before. "Shows a conservative delivery estimate to avoid delays."
5. Save
Click Save in the bar at the top of the page. Check the dates in the preview first.
How the dates are calculated
For each step after Purchased:
- Start from the previous step: its earliest date (optimistic mode) or its latest date (conservative mode).
- Add Min waiting time in days.
- For the Processing step only: if the time is past the Cutoff time, add one more day.
- If that day is not a working day or is a blocked date, move to the next working day. This is the earliest date of the step.
- Add the remaining days up to Max waiting time, counting only working days and skipping blocked dates. This is the latest date of the step.
Example. Processing: 1–2 days, cutoff 14:00, working days Monday to Friday. Delivered: 3–5 days, working days Monday to Friday. A shopper views the page on Friday, Oct 9 at 15:00:
| Step | Optimistic | Conservative |
|---|---|---|
| Purchased | Fri, Oct 9 | Fri, Oct 9 |
| Processing | Mon, Oct 12 – Tue, Oct 13 | Mon, Oct 12 – Tue, Oct 13 |
| Delivered | Thu, Oct 15 – Mon, Oct 19 | Fri, Oct 16 – Tue, Oct 20 |
Processing: Friday + 1 day is Saturday, it is past 14:00 so one more day makes Sunday, and the next working day is Monday, Oct 12. One more working day gives Tuesday, Oct 13. Delivered in optimistic mode starts from Monday, Oct 12 and adds 3 days (Thursday), then 2 more working days (Friday and Monday).
The dates use the shopper's device date and time.