
How to choose where the countdown timer shows
Overview
The Placement step controls where the timer shows. The pages you can pick depend on the timer type you chose.
Steps
1. Open the Placement step
Open Countdown Timer bars, click the timer name, then click Placement.
2. Choose the pages
| Timer type | Page to display options |
|---|---|
| Top Bottom Bar | Every Page, Product Page, Home Page only, Password Page, Collection Page, Manual Position, Sticky to bundle offer |
| Product Page Countdown Timer | Product Page, Manual Position, Sticky to bundle offer |
| Landing Page | Password Page, Collection Page, Manual Position, Sticky to bundle offer |
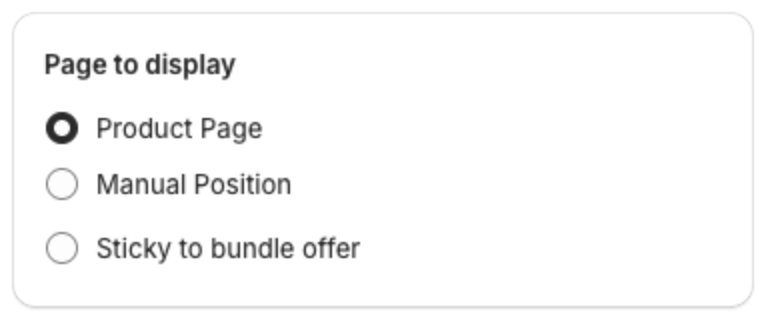
3. Choose the position
Under Show countdown timer on:, select where the timer sits, for example Below buy button, Above buy button, Top of page or Bottom of page (on the password page: Above signup banner). Under Advanced position, select Sticky on top or bottom to keep a top or bottom timer on screen while shoppers scroll.
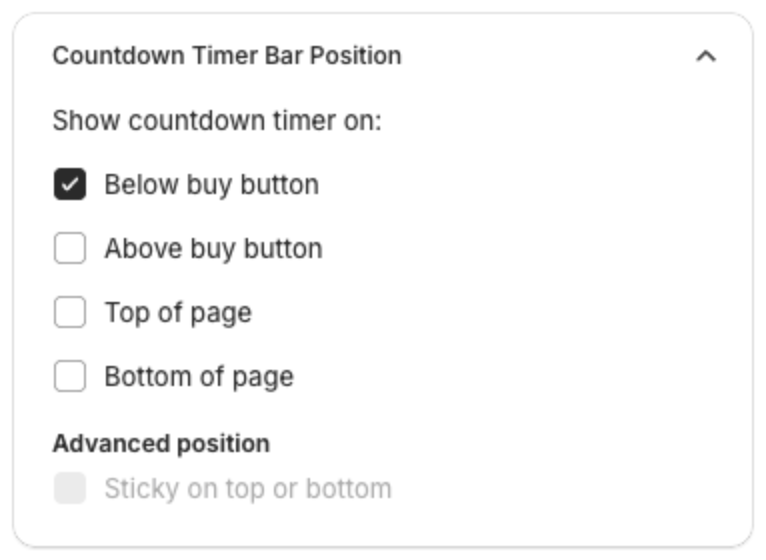
4. Choose products, countries, devices and dates
- Display bar for (product pages) — Specific products, Collections, All products, All products except or Except specific collections. With Specific products, select at least one product.
- Geolocation targeting Info — All countries or Specific countries. The country is the one your store uses for the shopper through Shopify Markets, the same country shown in your store's country or currency selector. It is not detected from the shopper's IP address.
- Device Targeting Info — Desktop, Mobile or both.
- Scheduled time — show the timer only between a start and an end date.
5. Save
Click Save in the bar at the top of the page.
Bundle offers. With XB: Bundles Quantity Breaks, select Sticky to bundle offer, then pick this timer by name in the bundle offer.