
How to manage your announcement bars
Overview
The Announcement bars page lists all your bars. From here you edit a bar, turn it on or off, copy it, delete it and set which bar shows first. The dashboard shows how your bars perform.
Steps
1. Open the list
In the app menu, click Announcement bars. The page lists every bar with its name, the pages it shows on, Status, Create on date and Priority.
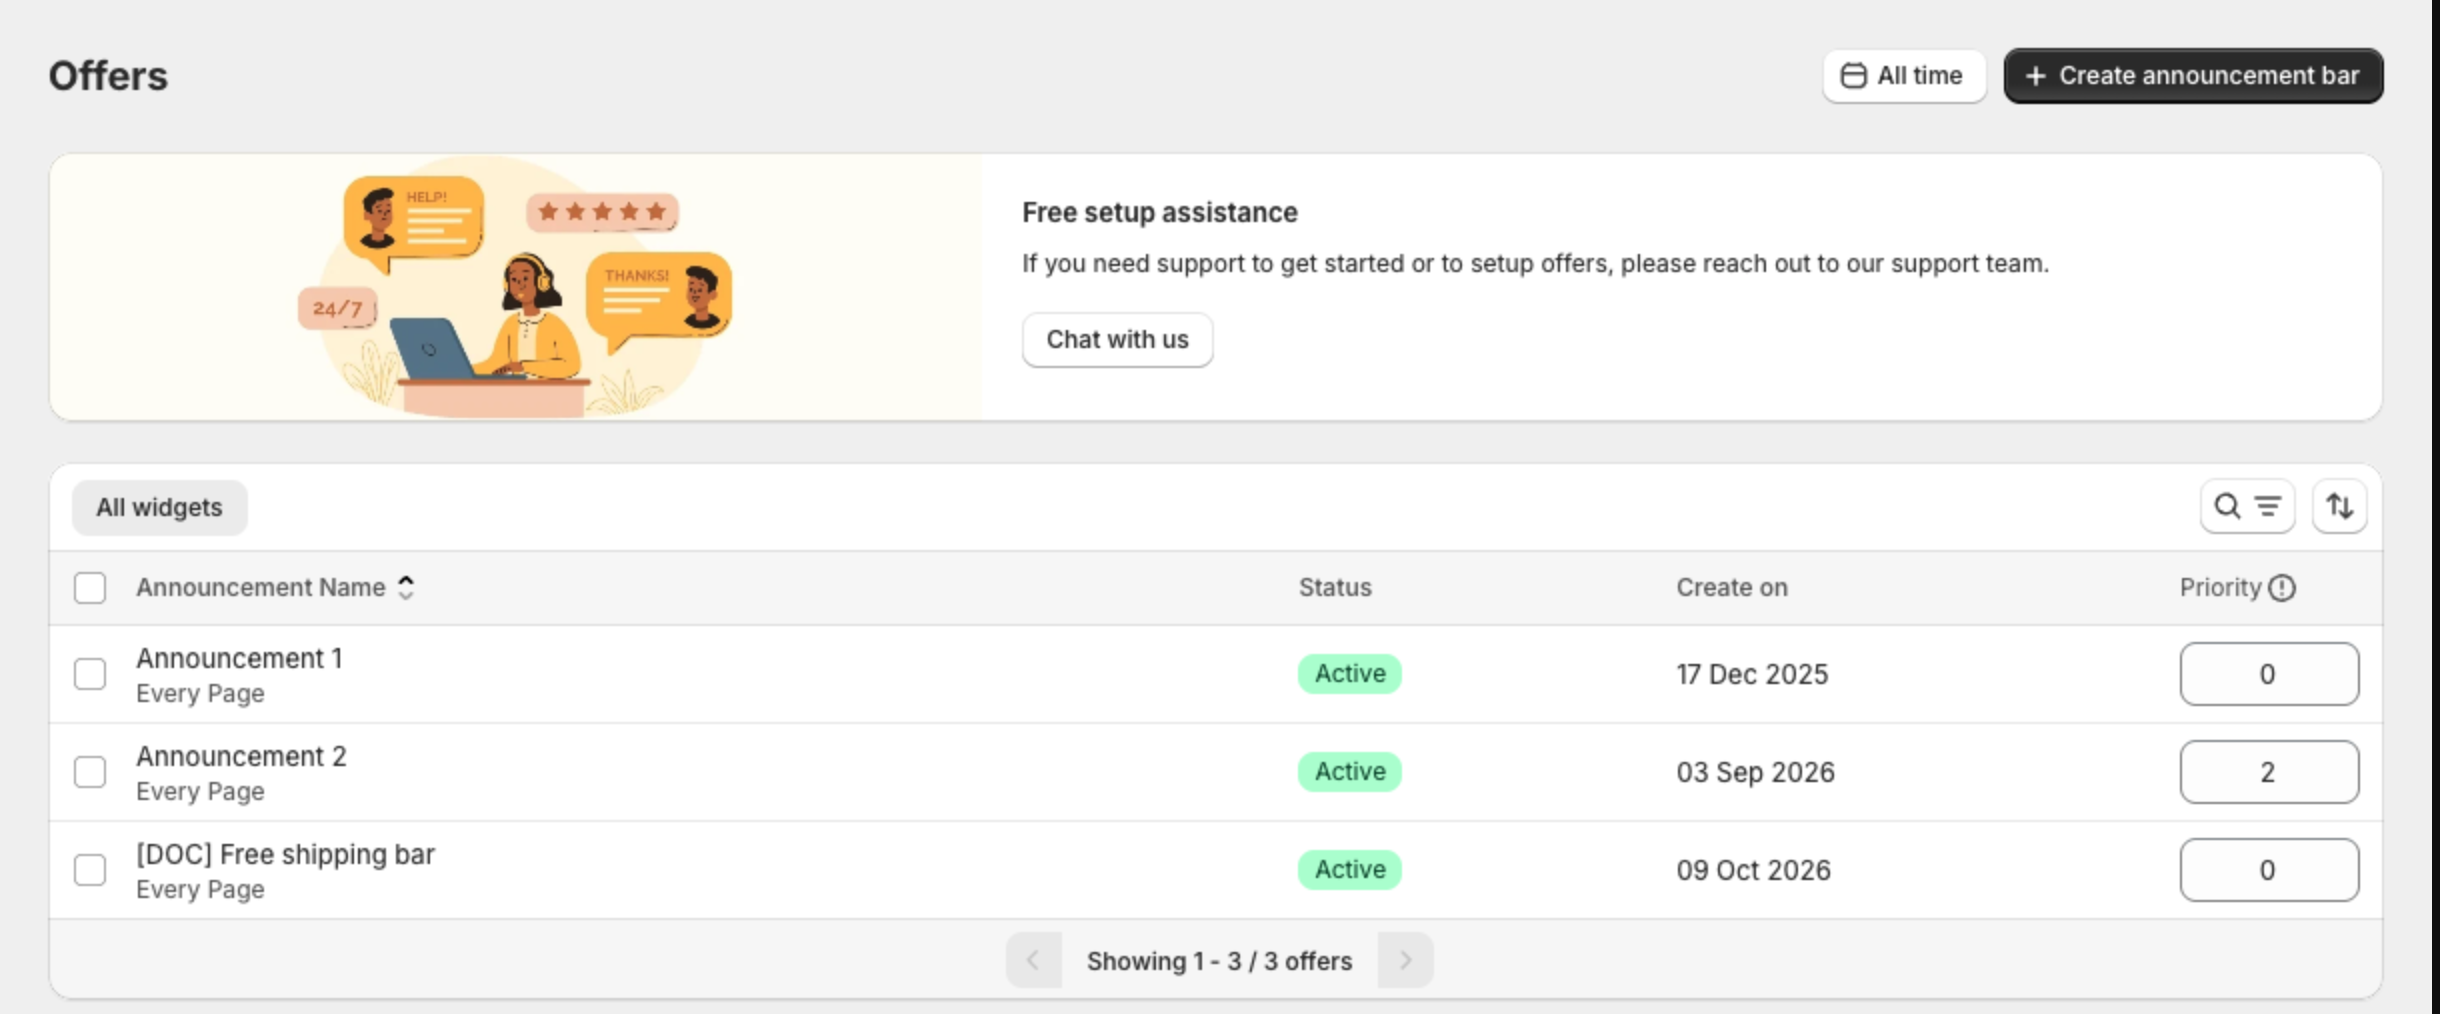
Use All time at the top to choose a date range, and the search and sort icons above the list to find a bar.
2. Edit a bar
Click the bar name. The editor opens. Make your changes, then click Save in the bar at the top of the page.
3. Turn bars on or off, copy or delete them
- Select the checkbox next to one or more bars.
- Click Activate or Deactivate, then confirm.
- For more actions, click the ... button: Clone makes a copy, Delete offers removes the bars.
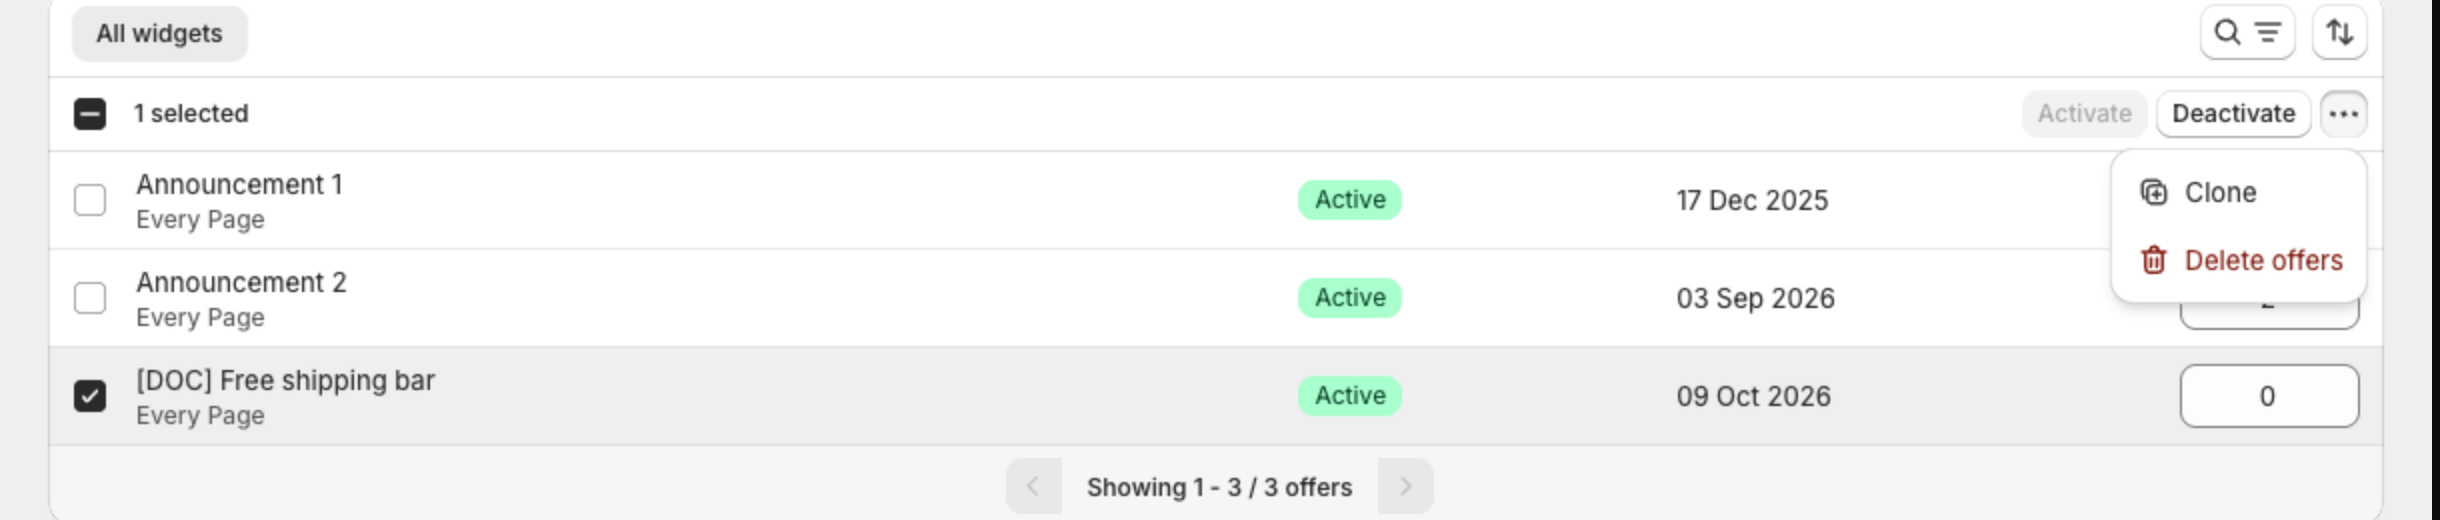
A deactivated bar keeps its settings. Activate it again at any time.
4. Set the priority
When several bars show in the same place, Priority sets their order. Type a number in the Priority box of a bar and click outside the box. The change saves automatically. A bar with a higher number shows above bars with a lower number.
5. Check performance on the dashboard
Open the app dashboard. The Analytics card shows totals for your bars:
- Impressions — how many times shoppers saw a bar.
- Total clicks — how many times shoppers clicked a bar.
- CTR — clicks divided by impressions.
Use the date button, for example Last 7 days, to change the period. The arrow and percentage next to each number show how it changed.

The Top announcements card on the dashboard lists your bars with their status.